Posts

Showing posts from 2015

XA4PPR with Jabber for in band registration

xmpp4r gem jid = Jabber::JID::new('admin@ejabberd.server.com/res') client = Jabber::Client::new(jid) client.connect client.auth("admin_password") iqr = Jabber::Iq.new(:set) qr = Jabber::IqQuery.new qr.add_namespace('jabber:iq:register') username = 'nishant' password = 'nishant' qr.add(REXML::Element.new('username').add_text(username)) qr.add(REXML::Element.new('password').add_text(password)) iqr.add(qr) client.send iqr
Imagemagick prerequisites

Before installing  Imagemagick  in your system. Make sure you have these dependencies installed 1) PNG library - development libpng12-dev 2) Independent JPEG Group's JPEG runtime library (dependency package) libjpeg8 You can install these dependencies using Ubuntu Software Center.

Difference between PATCH and PUT requests

PATCH does a partial update and PUT is used to update the whole resource. Lets take an example If PATCH request submitted with 2 fields for a resource with 8 fields, then only those 2 fields are updated and for PUT request the 2 fields are updated and others are set to their default/existing values.

Apache Benchmark for load testing

Apache Bench is a great load testing tool for web servers Here are the following steps 1. Install Apache Bench sudo aptitude install apache2-utils 2. Run Apache Bench The following line uses keepalive for 10,000 connections, at a concurrency of 100 and a timeout of 20 seconds. Be sure to end root domains with a slash. ab -k -n 10000 -c 100 -t 20 http://yourwebsite.com/

View logger output in rails console

First you need start the console and then assign rails logger it to use standard out. rails c >> Rails.logger = Logger.new(STDOUT) >> User.class_method_to_debug You can use similar approach to debug rake tasks etc. You can find more information here  Debugging rails applications

Asterix with arguments in Ruby

Lets create a method that accepts number of arguments def my_method(x, *y, **z) return x, y, z end Concept : x is a regular parameter. *y will take all the parameters passed after the first one and put them in an array. **z will take any parameter given in the format key: value at the end of the method call See the following examples: One parameter my_method(1) # => [1, [], {}] More than one parameter my_method(1, 2, 3, 4) # => [1, [2, 3, 4], {}] More than one parameter + hash-style parameters my_method(1, 2, 3, 4, a: 1, b: 2) # => [1, [2, 3, 4], {:a=>1, :b=>2}]

Date Localization and formatting

I18n.l is the easiest way to do it I18n.l(@user.created_at) And in case you want to use a different format : I18n.l(@user.created_at, :format => :short) You will find more documentation here

Tip : "Clear" in Rails Console

I don’t know about you, It doesnt feel nice when i am working at the bottom of my terminal window, or there’s a huge unnecessary output above where I’m working. Unfortunately, the typical terminal clear command doesn’t work in the console: >> clear NameError: undefined local variable or method 'clear' for # from (irb):1 So here is the trick use ctrl + l (with a lowercase L) and for Mac users, Command + k

Tip: Rescue blocks in Ruby

Everybody must have heard and used the exception handling in Ruby. But here is one trick that might be useful. "Rescue blocks don't need to be tied to a 'begin' " def x begin # ... rescue # ... end end def x # ... rescue # ... end You can also use rescue in its single line form to return a value when other things produces error. data = { :age => 10 } h[:name].downcase # ERROR h[:name].downcase rescue "No name" # => "No name"

Law Of Demeter (Optimizing Queries)

Smelly Code class Student < ActiveRecord::Base belongs_to :school end <%= @student.school.name %> <%= @student.school.address %> <%= @student.school.phone %> In the above code, Student model calls the properties of the association(User). The properties of the school being name, address and phone. This defies the Law Of Demeter. Refactored Code class Student < ActiveRecord::Base belongs_to :school delegate :name, :address, :phone, :to => :school, :prefix => true end <%= @student.school_name %> <%= @student.school_address %> <%= @student.school_phone %> Rails comes to your rescue as it provides a helper method delegate which uses the DSL way to generate the wrapper methods. Also, it prevents the error call method on nil object if you add option :allow_nil => true

Ruby Array : sort, reverse and unique

numbers = [1, 4, 6, 7, 3, 2, 5] => [1, 4, 6, 7, 3, 2, 5] Sort numbers.sort => [1, 2, 3, 4, 5, 6, 7] numbers = [1, 4, 6, 7, 3, 2, 5] => [1, 4, 6, 7, 3, 2, 5] numbers.sort! => [1, 2, 3, 4, 5, 6, 7] Reverse numbers.reverse => [7, 6, 5, 4, 3, 2, 1] Unique numbers = [1, 4, 6, 7, 3, 2, 5, 1, 2] => [1, 4, 6, 7, 3, 2, 5, 1, 2] numbers.uniq => [1, 2, 3, 4, 5, 6, 7] numbers = [1, 4, 6, 7, 3, 2, 5] => [1, 4, 6, 7, 3, 2, 5] numbers.uniq! => [1, 2, 3, 4, 5, 6, 7] Note : Using Exclamation mark to make changes in original array

Ruby Array : Push and Pop

Push chars = ["a", "b", "c"] => ["a", "b", "c"] chars.push "d" => ["a", "b", "c", "d"] chars.push "e" => ["a", "b", "c", "d", "e"] Pop : Last In First Out (LIFO) chars => ["a", "b", "c", "d", "e"] chars.pop => "e" chars.pop => "d"

Ruby Array : Modification

chars = ["a", "b", "c"] => ["a", "b", "c"] Insertion chars.insert( 1, "d" ) => ["a", "d", "b", "c"] Modify one element chars = ["a", "b", "c"] chars[1] = "d" => "d" chars => ["a", "d", "b"] Modify multiple elements using range chars = ["a", "b", "c"] => ["a", "b", "c"] chars[1..2] = "d", "e" => ["d", "e"] chars => ["a", "d", "e"]

Ruby Array : Deleting Elements

Deleting Array Elements chars = ["a", "b", "c"] => ["a", "b", "c"] Approach 1 : Using index colors.delete_at(1) => "b" colors => ["a", "c"] Approach 2: Using the actual value colors = ["a", "b", "c"] => ["a", "b", "b"] colors.delete("b") => "b" colors => ["a", "c"]

Ruby Array : Comparison

Lets start with two arrays array1 = ["x", "y", "z"] array2 = ["w", "x", "y"] Tip 1: Add two arrays and remove duplicates array1 | array2 => ["x", "y", "z", "w"] Tip 2: Keeping common elements and remove duplicates array1 & array2 => ["x", "y"] Tip 3 : Keeping unique elements array1 - array2 => ["z"]

Ruby Array : Concatenation

Arrays Concatenation  Approach 1 chars1 = ["a", "b", "c"] chars2 = ["d", "e", "f", "g"] chars = chars1 + chars2 => ["a", "b", "c", "d", "e", "f", "g"] Approach 2 chars1 = ["a", "b", "c"] chars2 = ["d", "e", "f", "g"] days = chars1.concat(chars2) => ["a", "b", "c", "d", "e", "f", "g"] Approach 3 chars = ["a", "b", "c"] chars << "d" << "e" << "f" << "g" => ["a", "b", "c", "d", "e", "f", "g"]

Cherry pick in Git

Cherry picking in git is a way by which you can move a commit from one branch and apply it onto another. Make sure you are on the branch you want apply the commit to git checkout master Execute the following: git cherry-pick <commit-hash> commit-hash can be found using git log

Titanium constants

These are several useful constants in Alloy. OS_IOS True if the app is running on iOS OS_ANDROID True if the app is running on Android OS_MOBILEWEB True if the app is running in mobile web ENV_DEV True if the app is running in the simulator ENV_TEST True if the app is running on a device ENV_PRODUCTION True if the app has been built for distribution

Doing things in non ruby way

Image
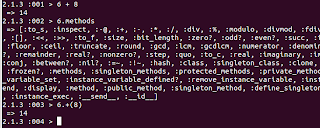
In Ruby, If we need to add two integers we can simply use 6 + 8 Another approach is using method invoking and passing arguments We are using .(Dot which is also called period) to invoke +( Plus method ) and sending 8 as argument. Similarly for Ruby Array

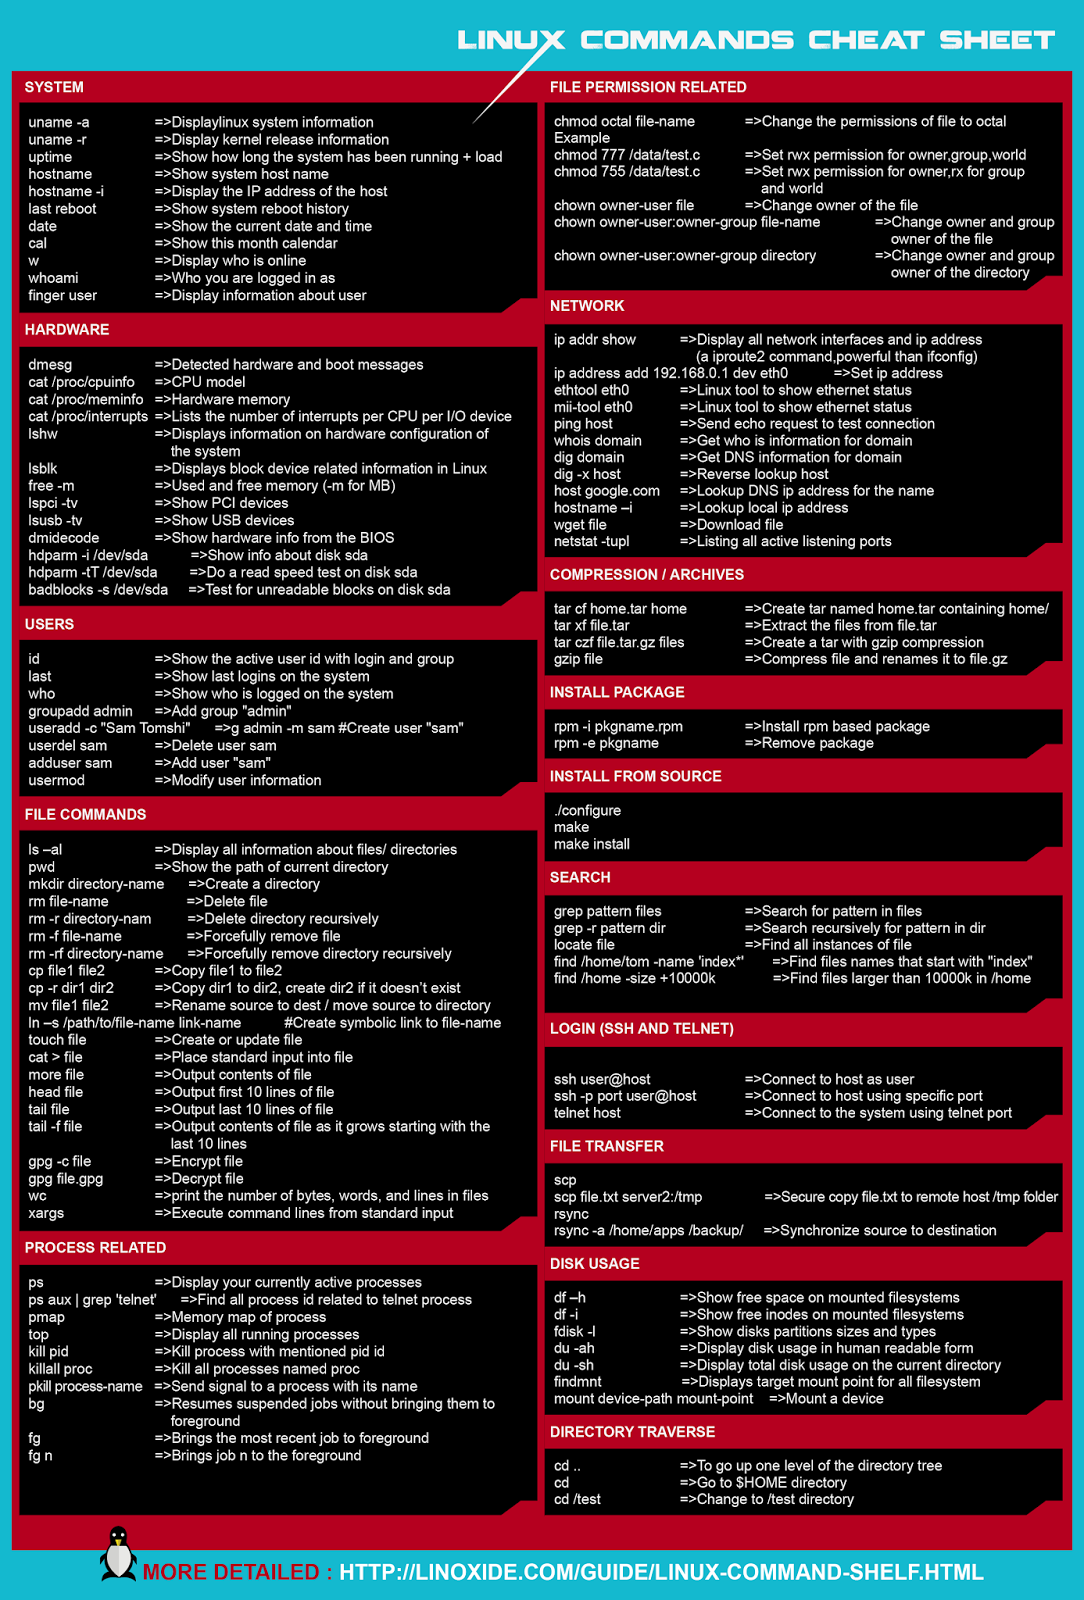
Linux Cheat sheet

Image

Installing Ruby on Rails on OS X 10.10 Yosemite

This post will help you setup Ruby on Rails for OS X 10.10 Yosemite. This setup is also compatible for older versions of OS X. Installing Homebrew Homebrew helps us to install and compile software packages from the source. Open your terminal and type the following command: ruby -e "$(curl -fsSL https://raw.githubusercontent.com/Homebrew/install/master/install)" Installing Ruby Once homebrew is finished installing, we can proceed to install Ruby. For now we will be using rbenv to install and manage our ruby versions. To do the following, type the following command in your terminal: brew install rbenv ruby-build # Add rbenv to bash so that it loads every time you open a terminal echo 'if which rbenv > /dev/null; then eval "$(rbenv init -)"; fi' >> ~/.bash_profile source ~/.bash_profile # Install Ruby 2.1.5 and set it as the default version rbenv install 2.1.5 rbenv global 2.1.5 ruby -v # ruby 2.1.5 Installing Rails Once Ruby is con